Introduction
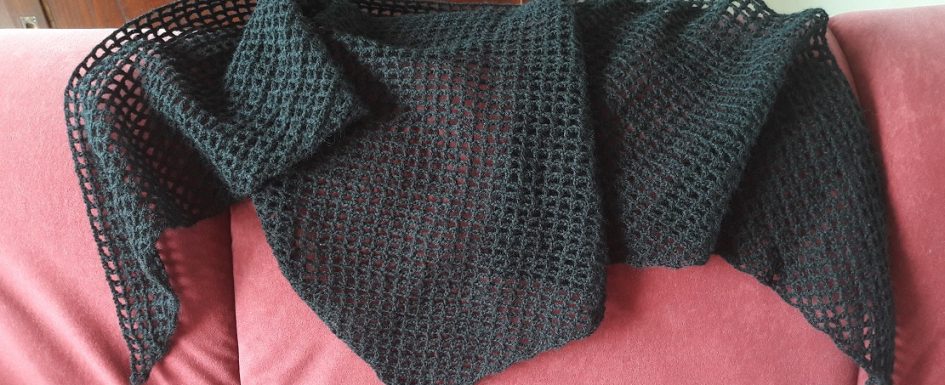
This shawl can be made super quickly. This is made using the ‘standard’ method for filet crochet, but with slanted sides. Usually with filet crochet you see that, when increasing, whole squares are added to the sides, but with this method you will get nice slanted side spaces. Really really simple.
As you see the shawl here, it is not embellished further. If you have a nice lovely yarn, that’s maybe not necessary. And if you appreciate a minimalistic look, you can just leave it this way of course. But you can embellish this basic shawl in different ways. Some possibilities:
- If you have a nice motif, you can make closed squares instead of open squares. You will have to figure out in advance how large you will be making your shawl: how many rows will you do and which motif fits into that? And take into account that a hole doesn’t have to be quite square. Measure this in advance with a swatch that is also blocked!
- You can make or buy embellishments and attach that to the shawl.
- Embellishing the shawl with surface crochet. This means you will crochet on top of the mesh. You can do that in straight horizontal, vertical or diagonal lines, with round shapes, you can use motifs, use color on a solid background, solid color on same solid color for a monochromatic effect, yarns that are different than the yarn of the background, there are no boundaries to your imagination 🙂 . A whole creative world lies open for you.
The video
I made a video on how to make this shawl. I used a light colored and thick yarn in the video, so you can clearly see the technique. I focus also on where and how to insert your hook, which is handy for you if you do not have very much experience crocheting. This makes this a very suitable project for beginners. After the link to the video you will find the written tutorial.
What do you need
- yarn used: Alize Angora Gold
- You need: 1 ball of 100 grams. I used 87 gram of it for the measurement of my shawl.
- Hook size: 3 mm (D)
Size
- 62 squares high and 124 squares wide, for this yarn this was 62 cm high en 152 cm wide
Info yarn
- 1 ball is 100 gram and 550 meters
- composition: 80% acrylics, 10% mohair and 10% wool
Used stitches (US terminology)
- ch = chain stitch
- dc = double crochet
- tr = treble crochet


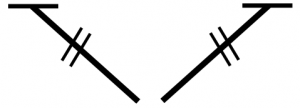
Important info about the stitches and some tips
- Pay attention where to insert your hook when doing the last double crochet in a row. I show you eaxactly where and how to do that in the video, but also in the tutorial hereafter. Take up the ‘bump’ of the back of the chain stitch also (that is facing you now!), to prevent the side stitch from stretching out and making a ‘hole’.
- Count the number of mesh holes after every row! You should always have an even number of open spaces.
The pattern
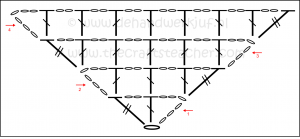
Row 1
Start with making a slip knot and put it on your hook. Make 1 chain stitch. This first chain stitch is the lower middle point of your shawl and will be the place where you will insert your hook to make your first double crochet and treble crochet.
Slanted side at the start of the row: Make 6 chain stitches. Each row will start with making these 6 chain stitches. Make 1 double crochet into the first chain stitch you made. You have now made a slanted side at the start of the row.
Slanted side at the end of the row: Make 2 chain stitches and a treble crochet, that you will insert into the first chain stitch where you also made the double crochet. You have now made a slanted side at the end of the row
Row 2 and further
Turn your work.
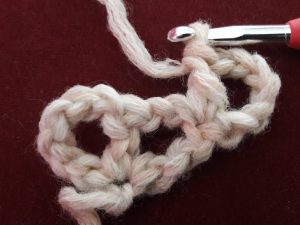
Slanted side at the start of the row: Start again with making 6 chain stitches and 1 double crochet. Insert your hook into the head of the treble crochet of the previous row.
Open spaces: After this you will make open spaces: (2 chain stitches, skip 2 stitches of the previous row, 1 double crochet in the next stitch) *. You will always repeat this an even number of times. In row 2 you will repeat this 2 times, in row 3 4 times, in row 4 6 times. In each row you will 2 more open spaces.
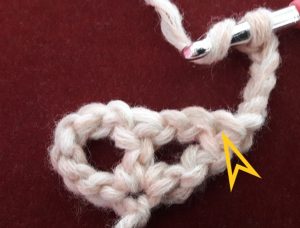
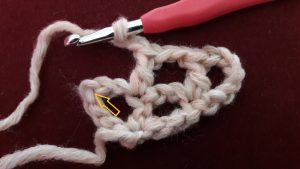
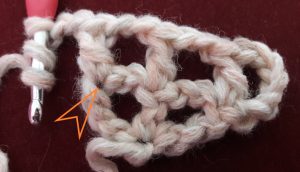
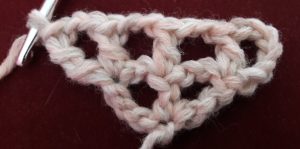
Pay attention to where to insert your hook with the last double crochet. This is the 3rd chain stitch of the chain space of the previous row. I marked the spot at the yellow arrow in the first picture. Do not only pick up the upper loop, but also the bump right under it. This prevents the loop of the chain of being stretched out too much with blocking. When inserting your hook you will have 2 loops of the chain stitch on your hook (see second picture).
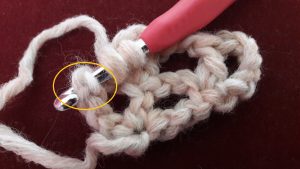
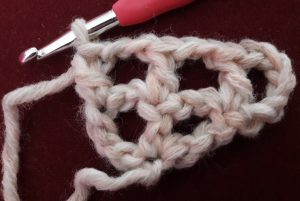
Slanted side at the end of the row: Make 2 chain stitches and a treble crochet, that you will make into the same chain stitch where you made the double crochet. You now made a slanted side at the end of the row.
You can now repeat these rows over and over. With each row you will get 2 more open spaces. Continue till you have reached the desired height and width.
Finishing
Block your shawl and use the method that’s most suitable for the yarn you used. For this shawl I used my handsteamer, a really ideal tool!
You can add a decorative border to the shawl of your own choice. In the picture of the shawl you can see I didn’t do that yet, because I will use the shawl for further embellishment.

